An SCP fetcher fetches logs from the log files present in the remote host using an SSH connection.
Go to Configure >> Built-in Collectors/Fetchers >> SCP Fetchers.
Select the LogPoint instances where you want to configure the SCP fetcher.
Click Next.

Configuring the SCP Fetcher with Password Authentication
Configuring the SCP Fetcher with Certificate Authentication
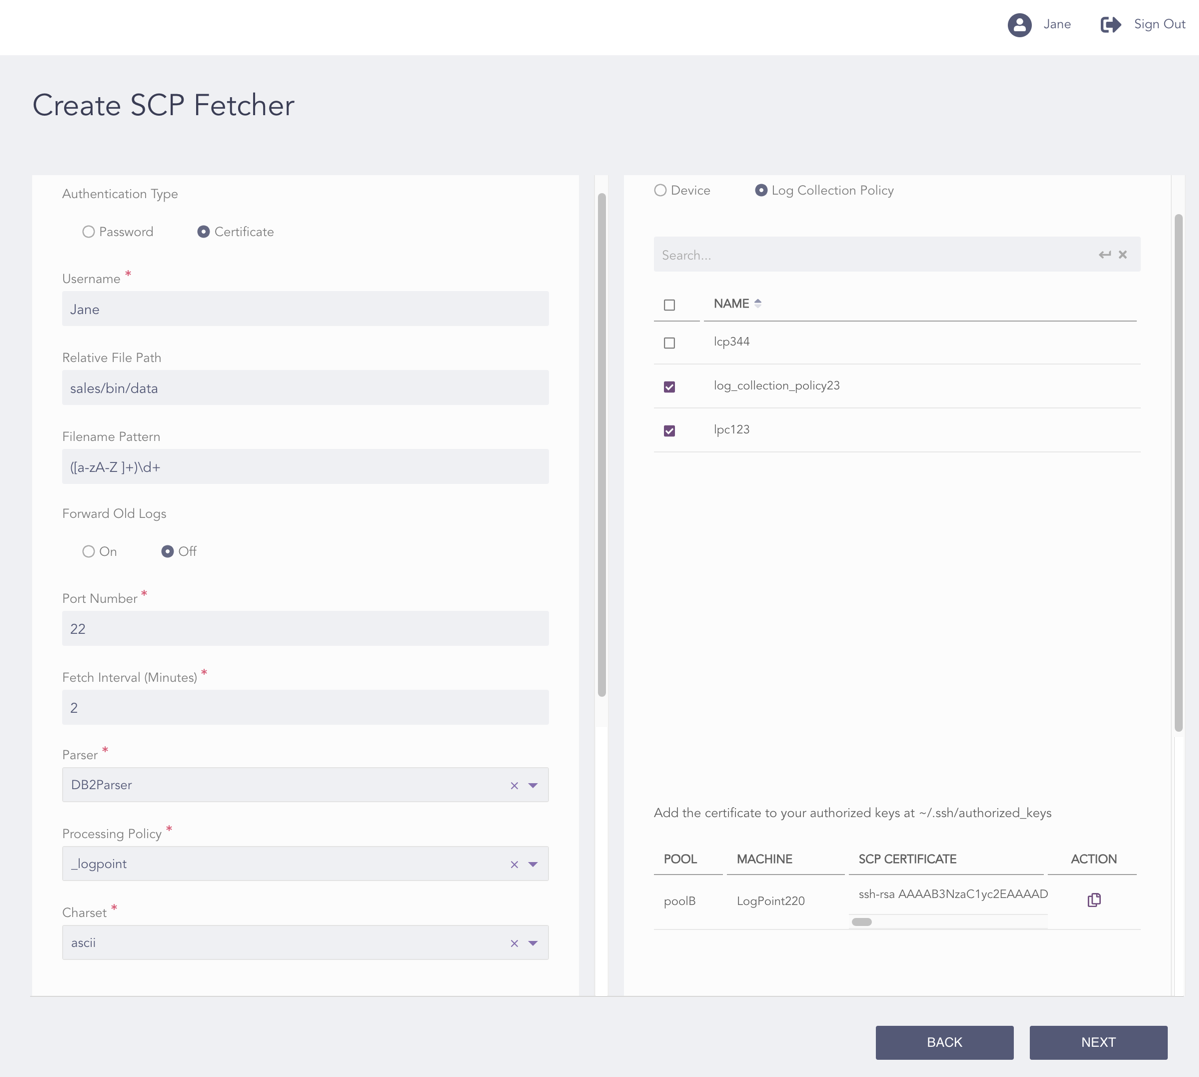
Select an Authentication Type:
If you select Password, enter a username and a Password for authentication.
If you select Certificate, enter a username, you can view the produced SCP certificate key on the right side of the page.
Note
The SCP Certificate is unique for each LogPoint. Thus, for multiple LogPoint instances, the application creates a distinct certificate for each one.
Save the password or the SSH certificate key, as it is required later for the user validation.
Enter the Relative File Path. This field denotes the base directory (can also be relative to the user’s home directory). Only the names of the subfolders and files within this location are matched against the Filename Pattern to determine the files whose contents are read by the SCP Fetcher.
Enter the Filename Pattern in regex to fetch the files matching the pattern. The application applies this pattern to the path within the base directory.
Under Forward Old Logs, select On to forward old logs, otherwise, select Off.
Enter the Port Number on which the SCP service listens on the remote server. The default SCP port is 22.
Enter the Fetch Interval time in minutes.
Select a Parser.
Select a Processing Policy.
Select an encoding format from the Charset drop-down.
You can either configure the SCP fetcher to a device or a log collection policy.
13.1. If you select Device, select all the devices where you want to configure the fetcher.
Note
For multiple LogPoint instances, you can select the devices common to the selected LogPoint instances only.
13.2. If you select Log Collection Policy, select all the log collection policies where you want to configure the fetcher.
Click Next.
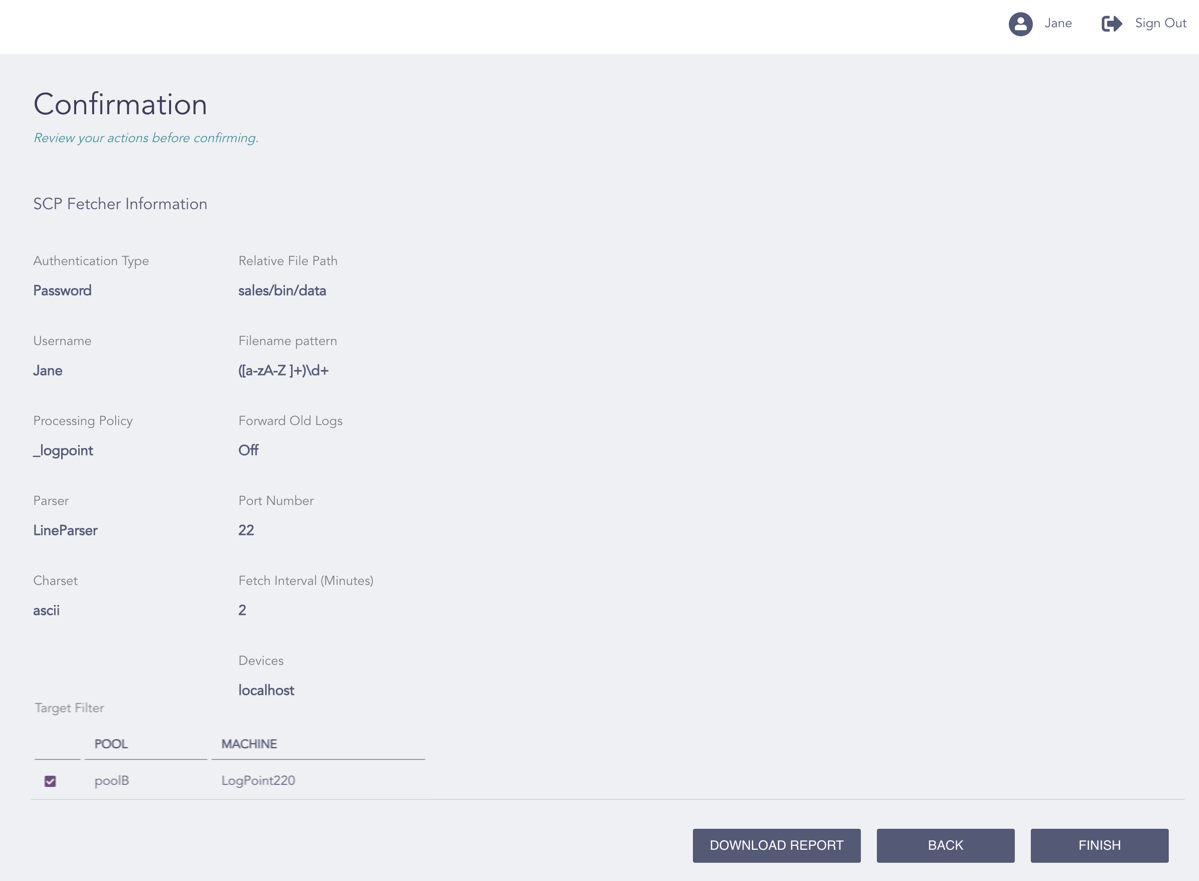
Confirming the Changes
Review your changes. You can go Back to make any changes if necessary.
Note
Click Download Report to save the summary of the task in PDF.
Click Finish.
Click OK.